How to Start an Ecommerce Business in 3 Weeks: Launching Cup & Leaf

Three weeks ago I was at the gym when an idea popped into my head:
“Screw it, let’s start the tea company.”
I’ve flirted with the idea of launching my own tea business for years:
- It’s been in my “Life Goals” list on Evernote since that note was first created.
- I’ve referenced starting a fictional tea company in some of my best marketing articles.
- I’ve owned the domain “natlikestea.com” for 3 years.
- I’ve written about tea on this site before.
- We’re frequently drinking (and plugging) some new blend of tea on Made You Think.
But I never seriously pursued it. I always had another project going and didn’t have the time, or I didn’t feel like I had the resources to dedicate to it.
A few weeks ago, I realized that wasn’t the case anymore. We’d started the Cup & Leaf blog as a Growth Machine project to give us a site we could use freely in case studies and serve as a training ground for new hires. The content was already going up on a good schedule, and we were in the waiting game to see when it would start to rank.
But traffic without sales isn’t particularly valuable. What good are 100,000 monthly visitors to your blog if they don’t buy anything? The case study of growing the Cup & Leaf blog would only be useful if we could show that not only were we getting traffic but that the traffic was also turning into sales.
And so started this journey to start a tea company to complement the blog, despite having zero experience with e-commerce, physical products, distribution, or any of the messy problems that come with working in meatspace.
Three weeks later, v1 of the Cup & Leaf store is live and has made its first sale. Since there was some interest on Twitter about everything I did to get this rolling, I thought I’d dive more into the details here.
As a quick overview, I’ll cover:
- Finding a supplier and getting our tea
- Setting up the online store
- Packaging and preparing the initial products
- Designing the blog to drive sales
- Launching
1. Finding a Supplier and Getting Our Tea
Here’s a small secret: most tea companies aren’t growing their own tea.
Some of the massive ones, like Teavana, might own some of their own tea farms, but most tea brands you come across are buying their teas wholesale from middlemen who buy in massive bulk from the tea farms around the world.
If you’ve ever wondered why most cheap teas taste strangely similar… that’s why. When you get into the premium tier you get more differentiation, but most cheap teas are coming from the same bulk distributors.
So while I’d love to have direct relationships with tea farms, or even buy our own, someday, it didn’t make sense to start there. It made the most sense to find a tea wholesaler that I could buy from in bulk, repackage, and sell.
Finding one was as easy as going on Google, searching “tea wholesaler,” and clicking around until I found some that looked legit. There are tons of them, thankfully.
I was primarily interested in ones that:
- Were U.S. based
- Had a small initial purchase requirement
- Stocked a huge number of teas
Basically, I wanted ones that would let me start cheap and fast while also being able to grow together. As soon as I started looking into wholesalers, though, it became obvious I needed a business to put all of this under.
You can’t just buy directly from most wholesalers the way you can buy from Amazon. Most wholesalers want an EIN (Employer Identification Number) that they can record their sales to, and I didn’t have a good one to use. I could have used Growth Machine’s, but that didn’t seem quite right, so I decided to go ahead an incorporate Cup & Leaf.
Incorporation
If I didn’t need the EIN I would have delayed this step, but since it seemed like it was going to be important, I went ahead and set up Cup & Leaf as an LLC.
I’ve used Incorporate.com in the past and they’re great. It took ~10 minutes to fill out everything online they needed to get the LLC created, and it’s not too expensive. It also only took them 2 days to get me an EIN.
Funny enough, shortly after I submitted the Incorporate.com info, I was contacted by one of the wholesalers I’d tried applying to without an EIN who told me I was approved for a merchant account using my Social Security number. So I didn’t need the EIN after all, but it was still nice to have for the future.
Choosing the Tea
Now that I had a merchant account, I needed to figure out what tea to get.
I decided to go with a mix of interesting teas that I really like:
And some more “standard” safe teas that people would recognize
I also wanted to make sure I had a tea to replace every ingredient in my Bulletproof Tea recipe, which meant I also needed a Yerba Mate.
With the tea ordered, all I could do on the product side was waiting for it to arrive. So in the meantime, I got to work on setting up the online store.
2. Setting Up the Online Store
Getting a basic store setup was one of the easiest parts. Shopify makes the whole process extremely easy and painless, I don’t think it took more than an hour to get a basic skeleton of the store up and running. And once a basic version was set up, Cosette, who did the Cup and Leaf blog, was able to hop in and design the store as well.
I went ahead and started adding the products using other sites’ photos as placeholders for the product images, but I still needed to figure out how I was going to price everything.
Pricing
I based the pricing on two metrics:
- My goal gross margin
- What other premium tea sites were charging
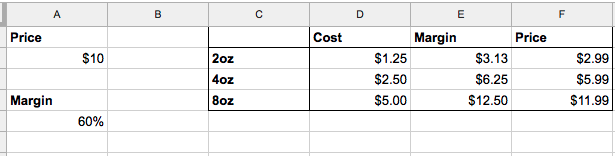
For a given tea, I started with what it cost me to buy it, at the three sizes I had decided to offer (2oz, 4oz, 8oz).
Let’s say that I can buy a 1lb bag of Cream Earl Grey for $10. Then my costs for the different sizes were:
- 2oz : $1.25
- 4oz : $2.50
- 8oz : $5.00
And let’s say that my goal margin was 60%. Then I’d need to divide each cost by 0.4 (1 – 0.6) to figure out what its price should be:
- 2oz : $3.13
- 4oz : $6.25
- 8oz : $12.50
Then I went with the best price close to that number so that everything on the site looked consistent, typically rounding down. In this case, I’d say:
- 2oz : $2.99
- 4oz : $5.99
- 8oz : $11.99
I figured I could always update this later, and it gave me a good enough place to start. And of course, I did this all in a big spreadsheet that looked something like this:
Once the pricing was done, I needed to add a few apps I thought would help me make more sales off the bat.
Reviews
This one is simple enough: people like seeing reviews before buying, to give some social proof that you’re a real site and people like your products.
Obviously, these are riskier in the beginning since not having them gives the opposite effect, but I figured that the sooner I had the reviews up, the sooner I could start collecting them.

For this, I used Shopify’s built-in reviews app.
Fomo
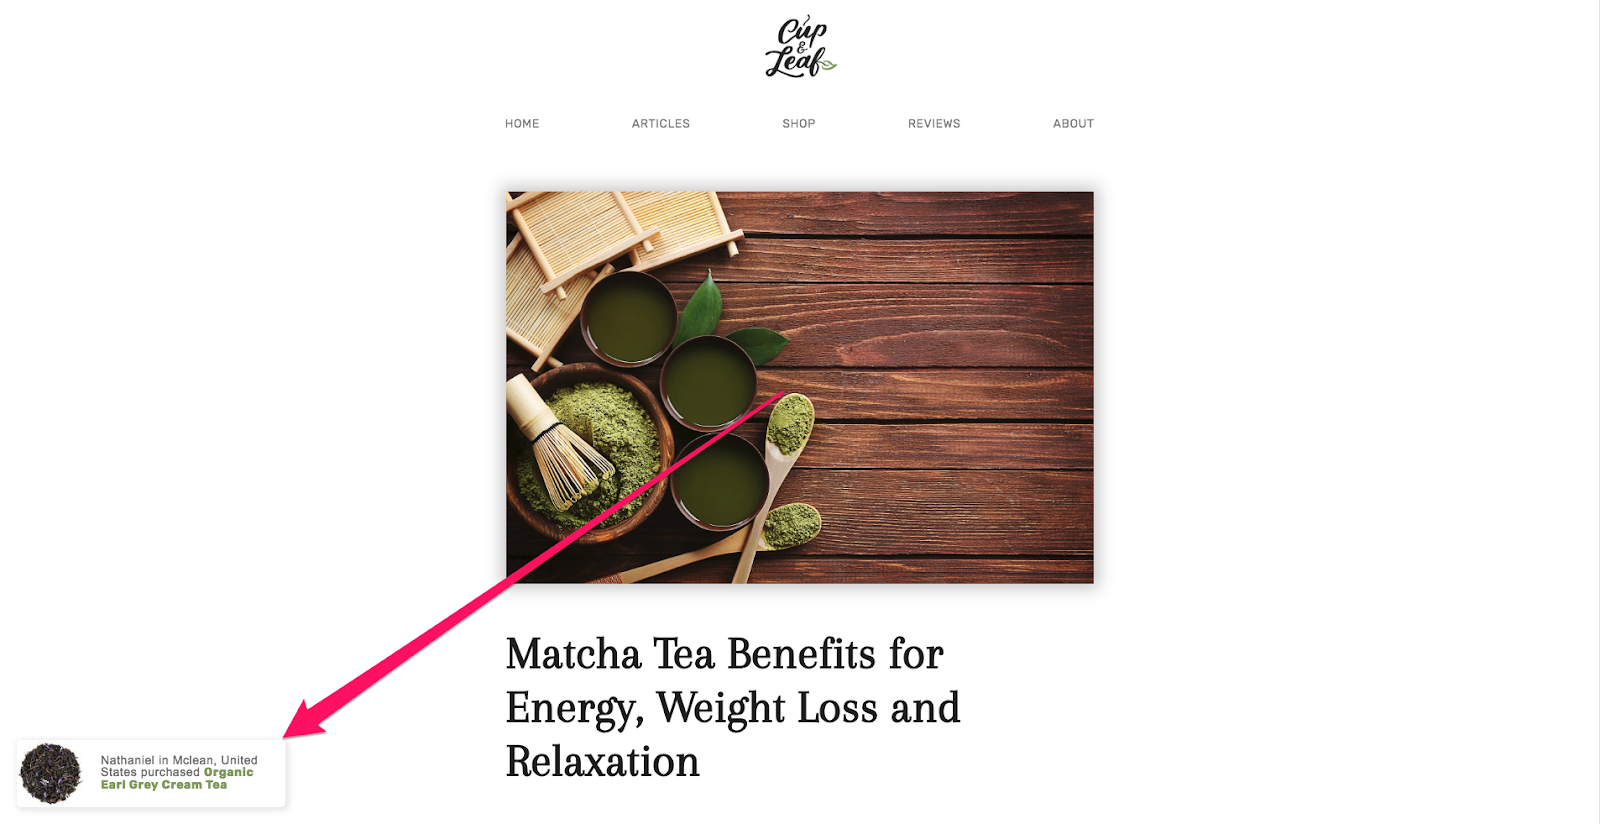
Next up for creating social proof was installing Fomo, a tool that gives little notifications on the edge of the screen to visitors looking at your site, to let them know that other people are doing the same thing:
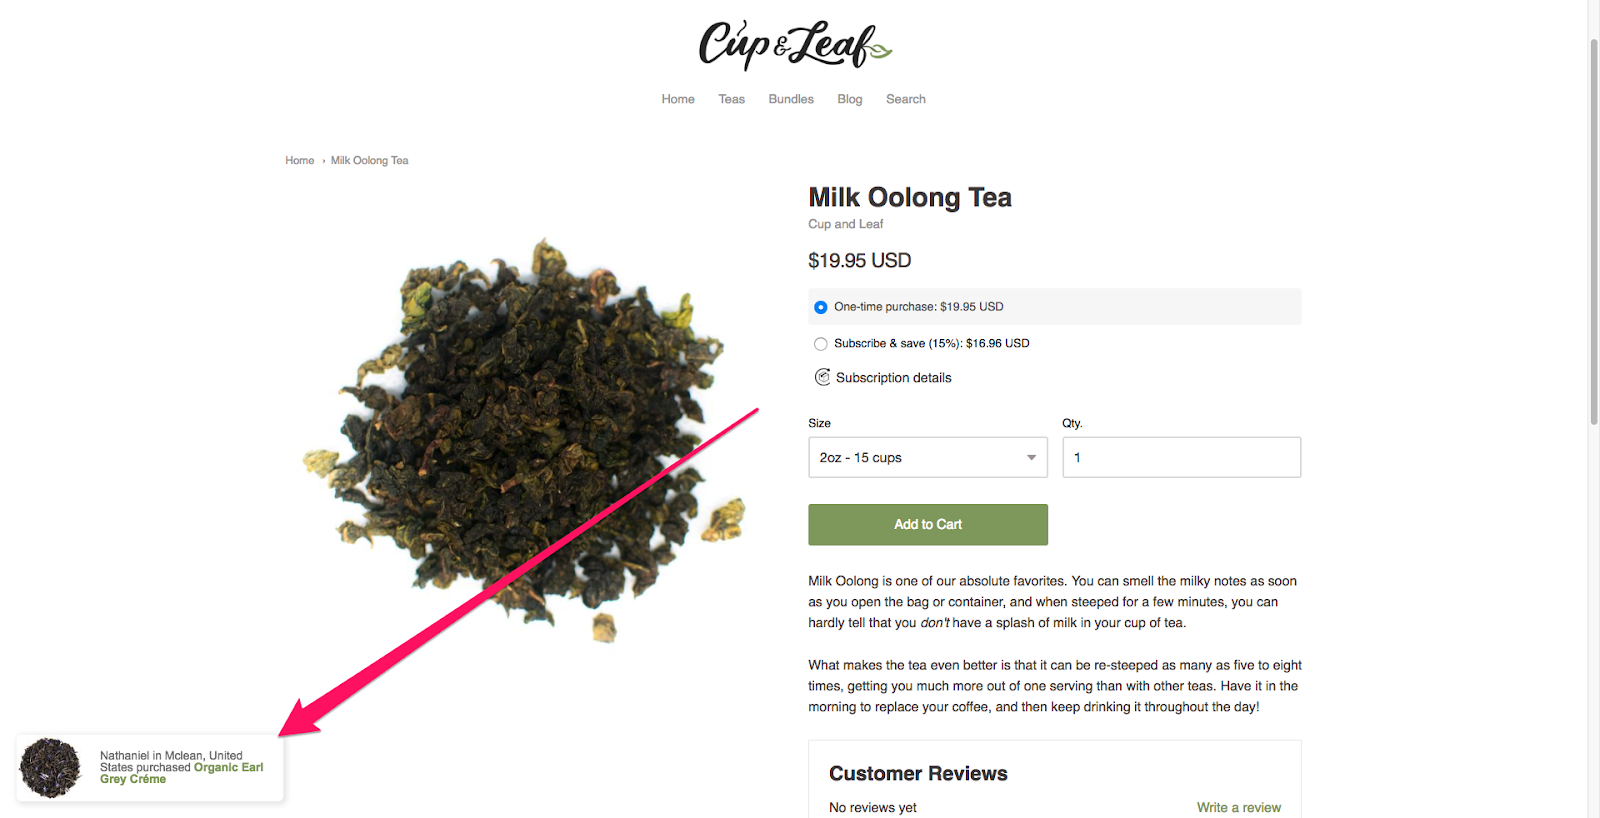
I’ve seen some of their behind-the-scenes data, so I can say that the notifications are really effective for increasing conversions & cart size. It won’t do a ton in the beginning when my traffic is low but similar to the reviews, I wanted it up there sooner rather than later.
Cross-Sell
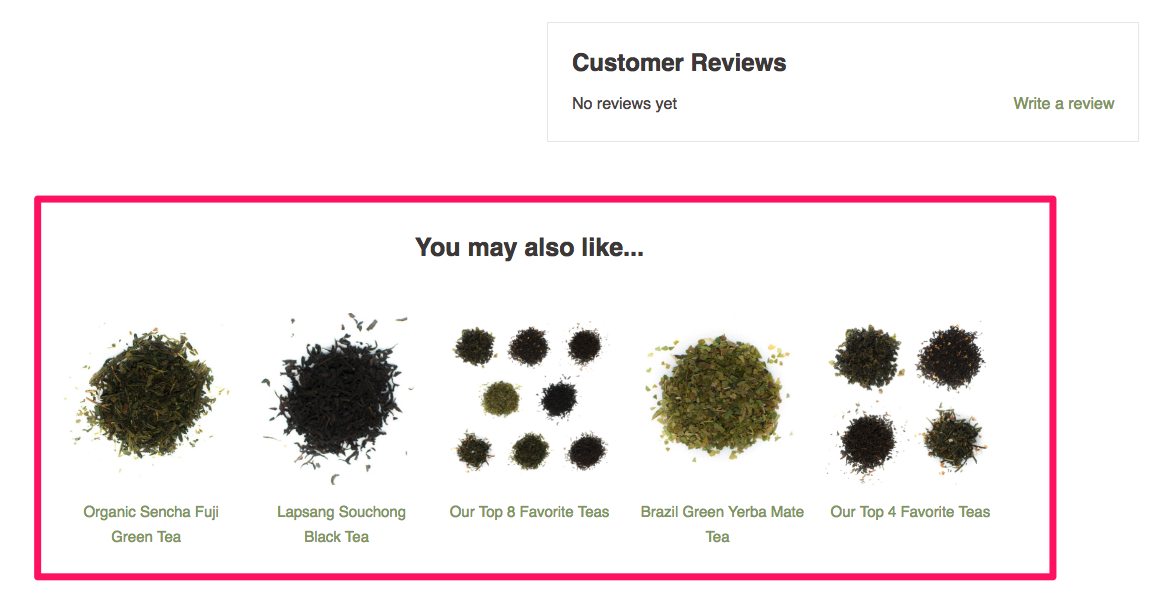
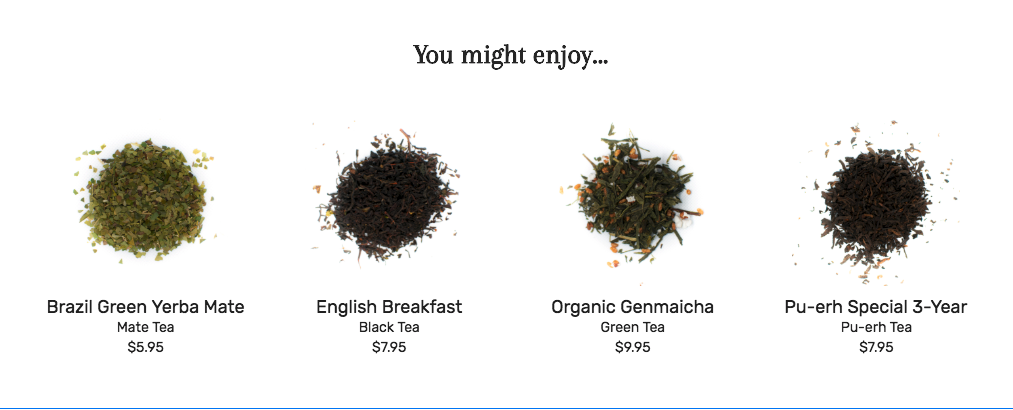
I also wanted to get cross-sells set up asap, since I’d seen some data on how effective it was for increasing cart size.
This is exactly what you expect: adding related items to each product page, and the cart, to entice shoppers into getting more. With tea, I’ve seen this work really well on me in the past, since I have a hard time saying no to trying at least one other tea I haven’t had before.
The Cross-Sell app’s team made this extremely easy. I just installed the app from the Shopify app store, then they went in and customized it to my theme. Impressive customer support for a $20/mo product.
Recharge Subscriptions
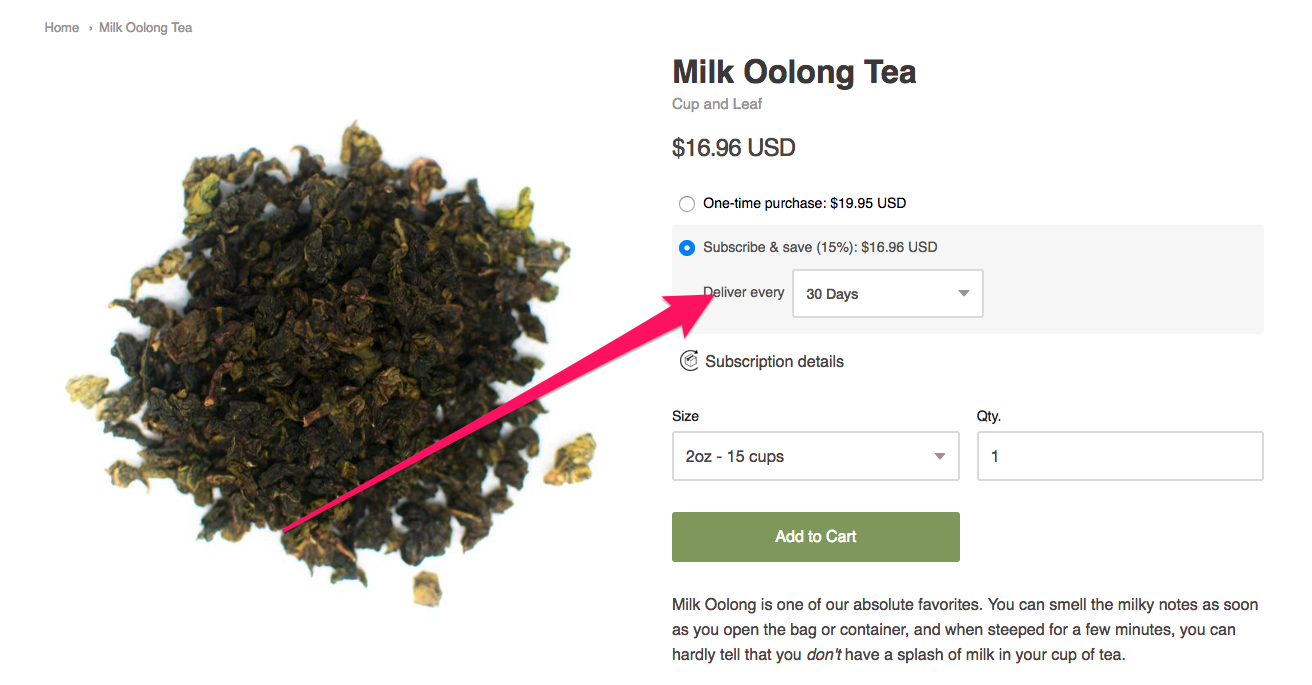
Next up was adding subscriptions. Giving people the option of buying on a recurring schedule for a discount just made sense, since if you’re drinking a cup of tea a day, you’ll get through most of the quantities in 15, 30, or 60 days.
Recharge is a kind of finicky app, and I had the most trouble getting this one just right, but once it was set up, it made it really easy for anyone to subscribe to one of the non-sampler-pack teas:
Free Shipping
Next was the free shipping offering. There’s an extremely popular Shopify app that makes this pretty simple called “Free Shipping Bar” where you set a price for free shipping, and then the little bar at the top of the screen automatically updates as people add more to their cart:
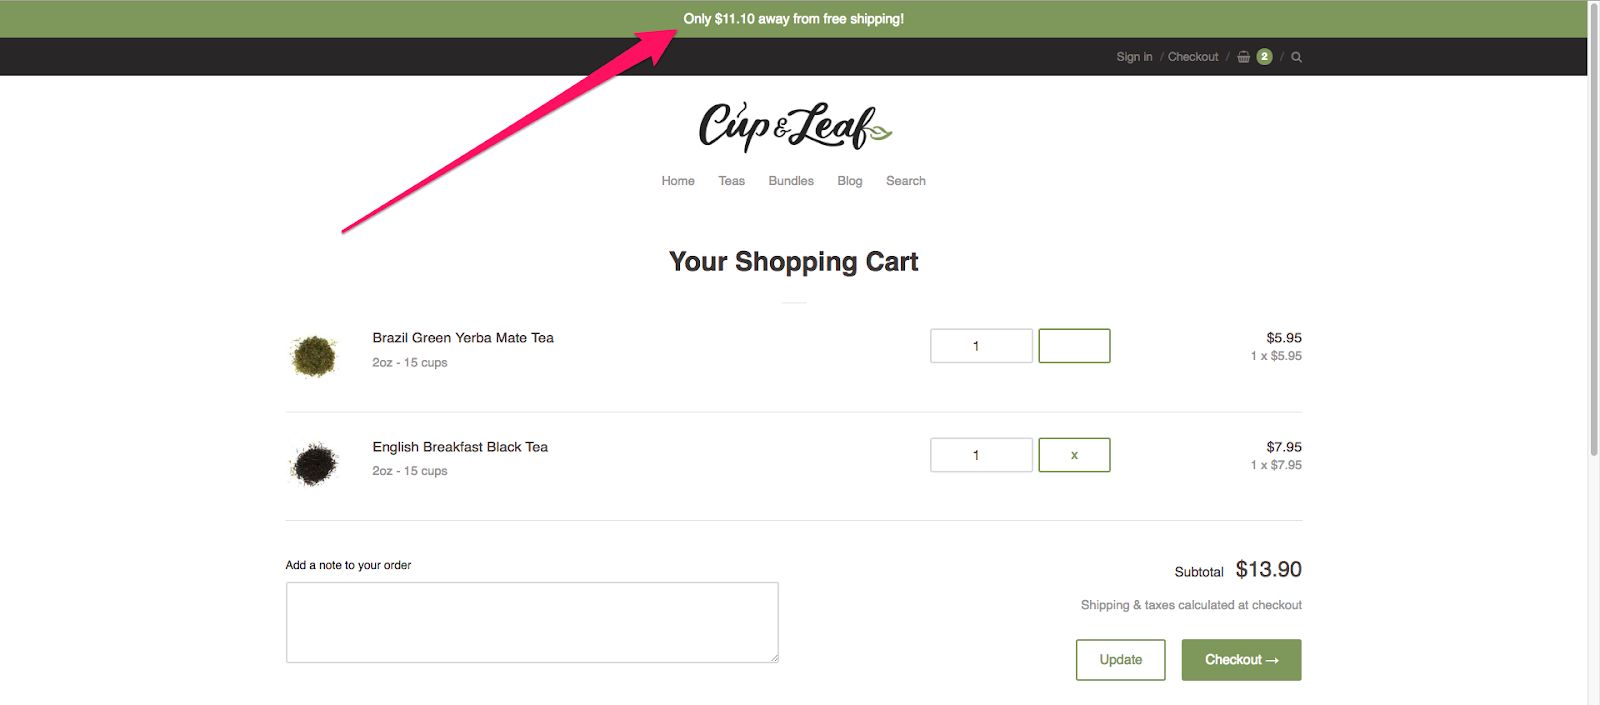
Simple, and a great incentive to increase cart size. Plus, since tea is so lightweight, and the margin starts off good, this isn’t that ridiculous of an offer.
Klaviyo
On the backend, I set up Klaviyo to handle the email marketing, since it does an amazing job of integrating with Shopify and tracking everything that happens in your store so you can send hyper-targeted emails.
To start, I set up emails for:
- Abandoned carts
- Thanking new customers
- Following up with new subscribers
- Asking for reviews / cross-sells
But this also lets me send a launch email along with this post, lets me welcome and onboard new blog subscribers, will let me do sales funnels, etc. It’s pretty powerful and seems to be the preferred email marketing tool for most of my friends with e-commerce stores.
Privy
The last step was adding Privy to handle exit-intent popups offering people 10% off their first order when they started to leave the store. This has had a really high conversion on some other stores I’ve looked at and is a much more valuable CTA than getting some silly free e-book about tea.

All of the apps gave me a good start on the site, now I needed to figure out the physical packaging.
3. Packaging and Preparing the Initial Products
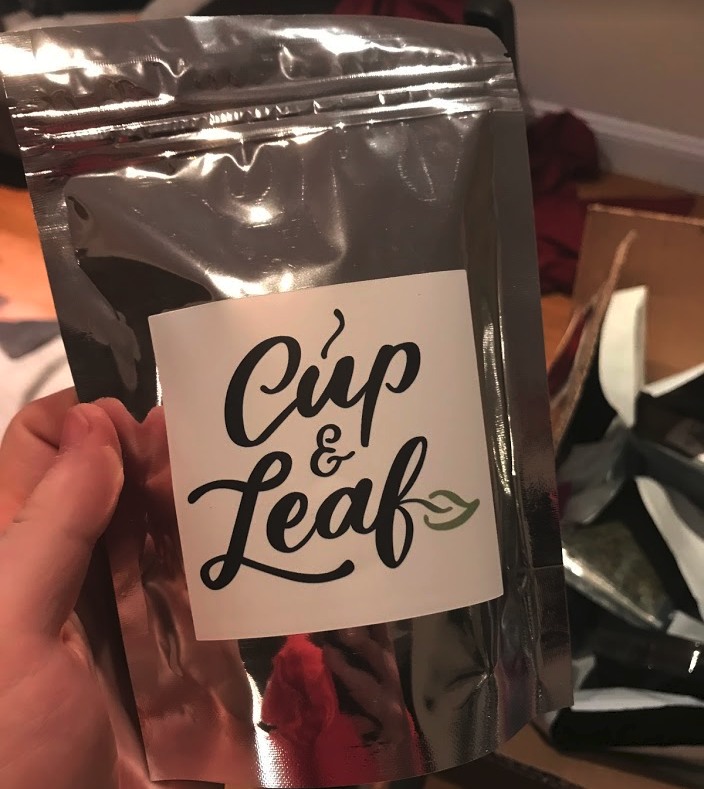
To start, I decided to do a simple packaging similar to how Teavana used to do their online ordering: labeled foil bags. I want fancy tins in the future, but for now, this made for a good MVP.
I went on Amazon and picked up 100 sealable foil bags of roughly the size I figured I needed, a heat sealer, shipping labels, shipping sleeves, and sticky labels I could use for the tea bags. And then I went on Stickermule and ordered 100 labels I could use for the foil bags to give them some branding.
I kind of had to guess at the sizes for this step. I didn’t have the tea yet and didn’t want to spend a ton of time messing with bag sizes, so I went with what seemed about right based on the dimensions of other bags of tea I had lying around the house. I ended up getting it right, thankfully.
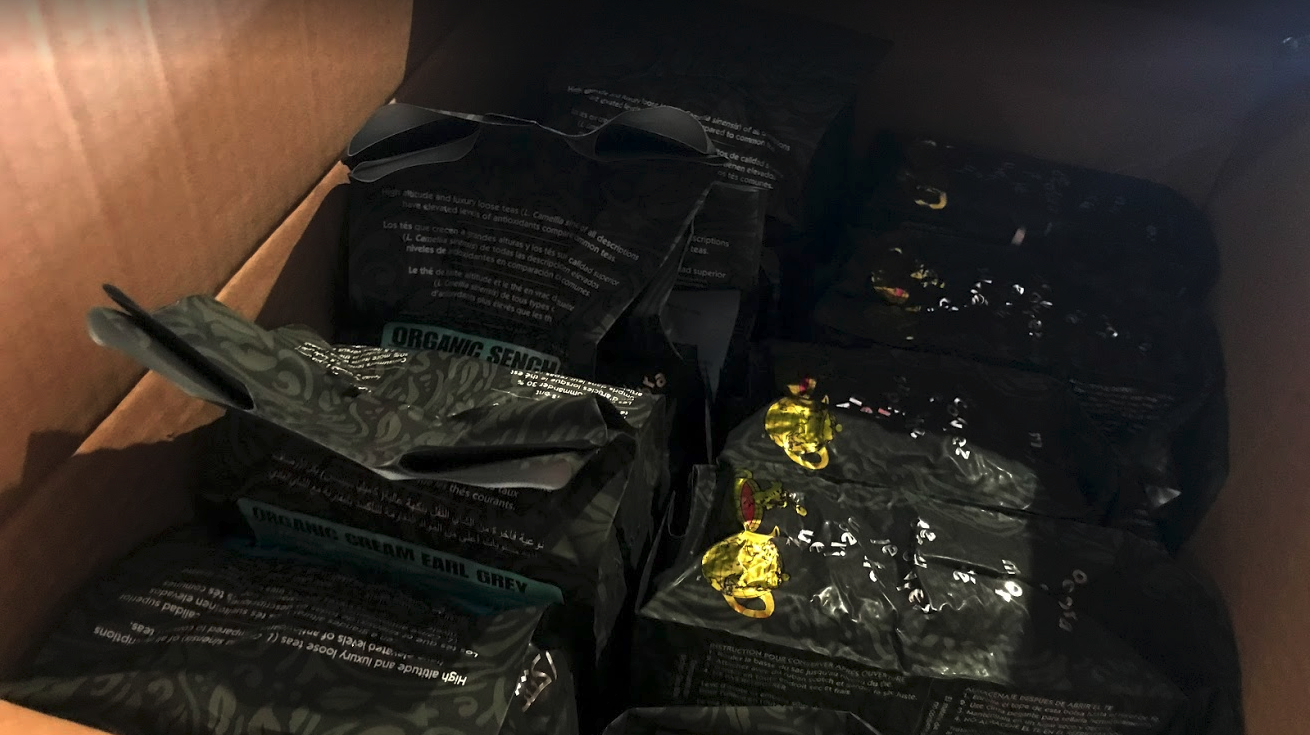
A week after ordering from the wholesaler, the tea arrived! It came in these cool vacuum sealed bricks:
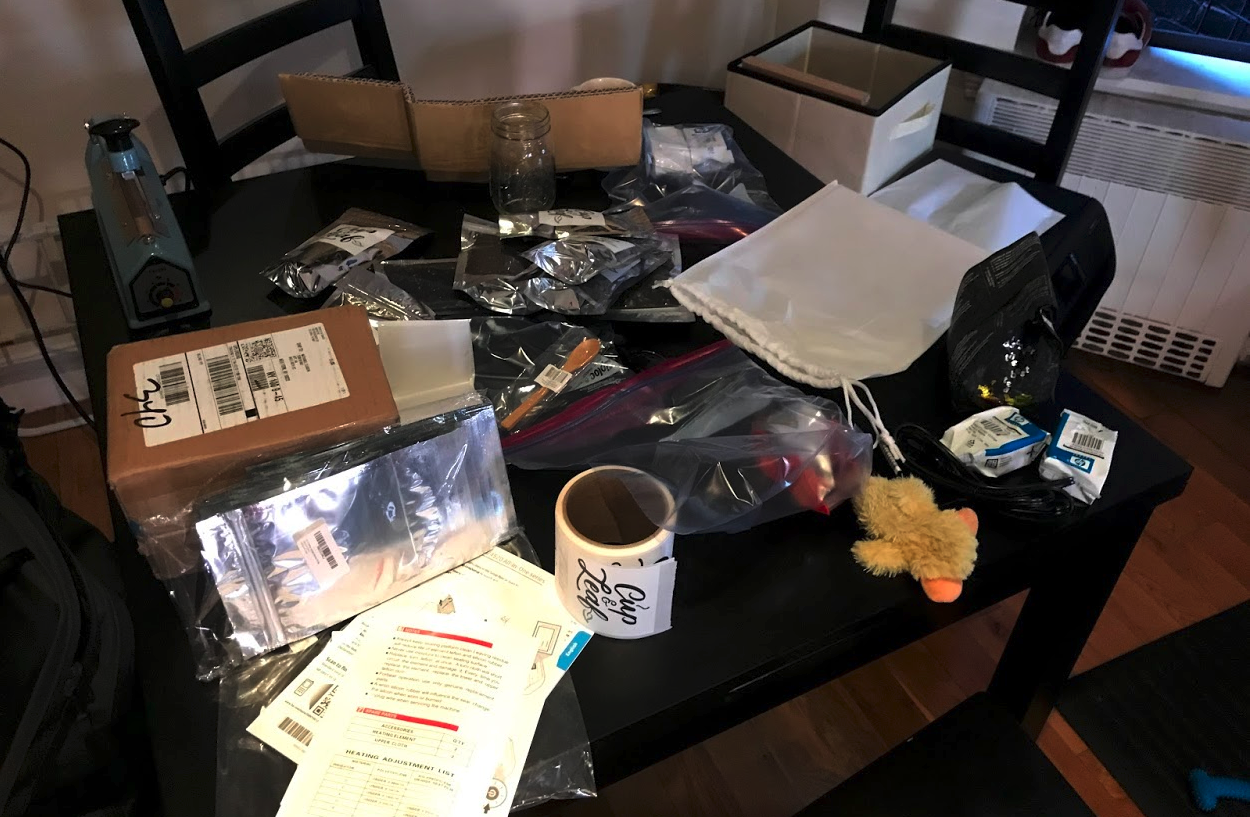
And then my girlfriend and I spent the rest of the afternoon doing some experimenting with the packaging, which turned the dining table into a bit of a mess:
But at the end of it, we had the first few teas packaged, and ready to be sent to the first paying customer (who may have been my mom), as well as Emily who designed the logo.
It was also at this point that I needed to take some product photos. Luckily I already had a DSLR from my experimenting with photography, and I ordered a cheap collapsable “lightroom” from Amazon to take the photos in:

And then I uploaded those photos to the store to replace the product photos I “borrowed.”
Also, a friend on Twitter suggested I offer “sampler” packs for people who weren’t sure what the teas were, which I thought was an amazing idea, so I added:
And will likely add more samplers as the product library expands.
Everything was about ready to go from the physical product and store side, now I just needed to integrate the blog to feature our products.
4. Designing the Blog to Drive Sales
Shopify’s blogging platform isn’t particularly robust, and Webflow isn’t great for e-commerce, so I wanted to keep the two separated. A blog on the root www.cupandleaf.com domain, and the store at shop.cupandleaf.com.
But the downside of this is that the blog can’t drive sales as naturally as it can if it’s built into Shopify, so I had to get a little creative.
The first step was adding Fomo to the blog as well, pulling in Shopify sales data so people reading the blog got the CTAs as well:
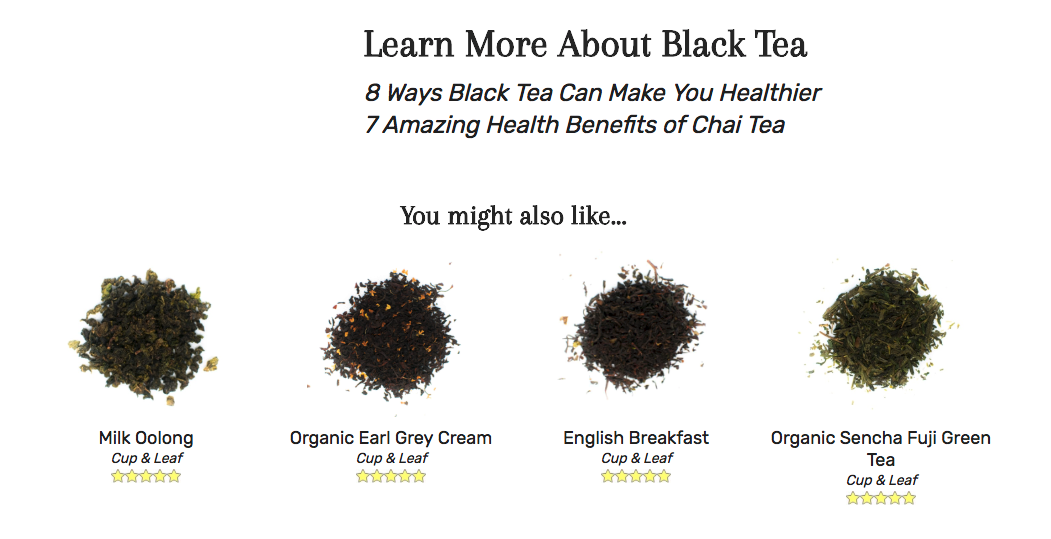
I also added a section at the end of each article suggesting some teas they might like to try:
And then the tea reviews are now set to prefer recommending our teas over other teas:
And with that, everything seemed ready to go! The last step was to launch the store.
5. Launching
I kept the launch fairly simple to start. I didn’t want to risk too many things breaking, so, for now, I just focused on the assets I already had.
I wrote this post, which while being informative, is also one giant advertisement 🙂
I started promoting Cup & Leaf on the Made You Think podcast.
I featured the launch in my Monday Medley newsletter.
And now… we wait and see what happens. Assuming everything goes well, I’ll be back in the future with more posts about Cup & Leaf, and with updates to this last section!